Follow this simple step-by-step tutorial to create folders and manage your Gmail inbox more effectively.
Follow this simple step-by-step tutorial to create folders and manage your Gmail inbox more effectively.
When you don’t have control of the bunch of emails you get daily, the mail controls you. A messy inbox makes it challenging to locate relevant emails when needed.
In Gmail, labels are the equivalent to having folders, and this is what we will create in this write-up—to help you organize your inbox better.
How to Create a New Folder in Gmail Quickly
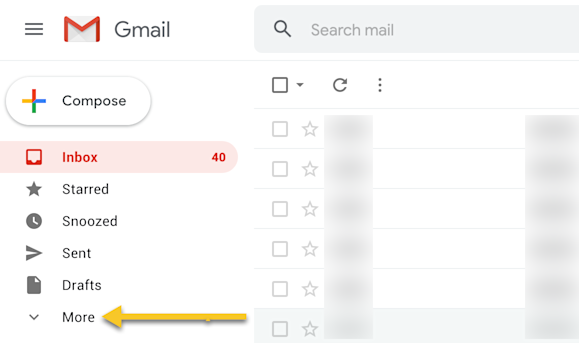
When you log in to your Gmail account, the interface will display your emails and a few default labels, consisting of Primary, Social, Promotions, Update, and Forums. Click on “More,” which will display a few additional options.
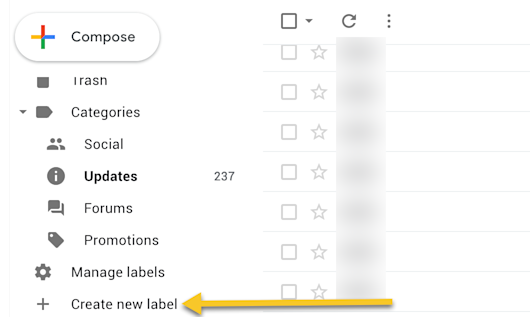
In the drop-down tab, choose “Create new label” to add a new label (folder).
On the following window, enter a new label name you wish to use. If you want to create the label under an existing label, check the “Nest label under” option and select it from the drop-down menu. Then click “Create” to finish.

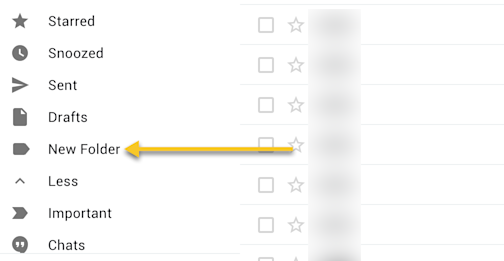
And that’s it! Your new label should now be on the list on the left side panel.
How to Effective Manage Gmail Folders
To create a folder in Gmail is one thing, and to effectively manage your emails is another. This section will illustrate how you can use Gmail labels to improve the workflows of your inbox.
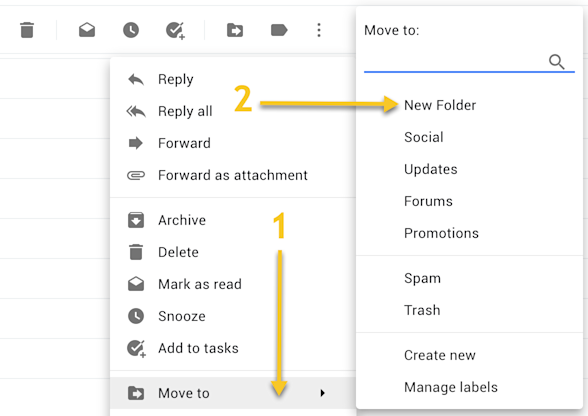
To manage your emails a bit better, start by sorting them into different categories and moving them into various labels.
Right-click on the mail you want to move, then select the label you want to move it to, as shown below.
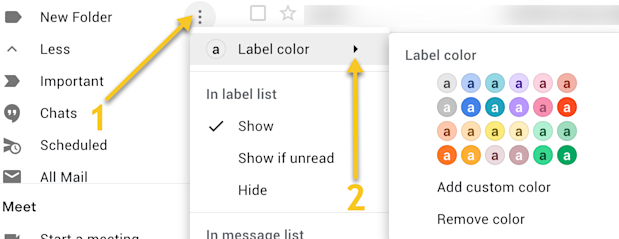
To make the new labels stand out, you can change the label color from the default. To do so, click on the ellipsis icon, as shown above. From the drop-down bar, select the color of your choice to represent the label.
Similarly, you can automatically assign emails to a newly created label or existing labels. Doing so saves the stress of having to move your emails around every time, which helps to organize your Gmail inbox just a bit better!
From your inbox, locate and click on an email from a sender that you want to always land in a specific folder (label). From there, choose the ellipsis next to the top label icon, and select “Filter messages like these.”

The “From” in the above interface indicates the email address of the sender. You can fill out as much info as you’d like here to create a new filter for similar emails. Then, click on “Create filter.”
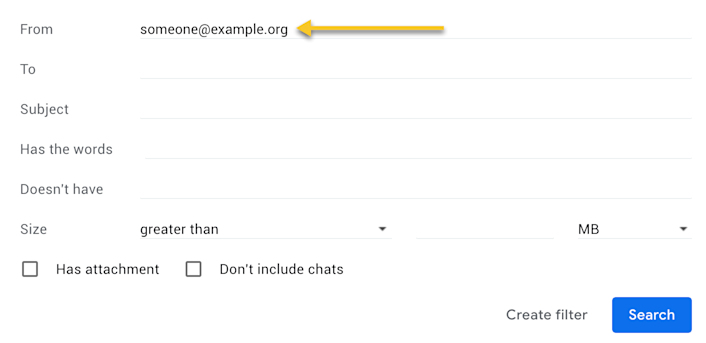
The following window is one filer example, where you send new emails from one specific party to a specified label. By skipping the inbox, you omit the need to manually sort your main inbox out. Remember to click on “Create filter” to finish setting up the rule.
Henceforth, all the emails from the specified address will automatically go into the selected label. All you have to do is click on the label chosen to filter out your emails.

How to Send Large Files via Gmail
With Gmail, you can conveniently send and receive emails, well as files. Unfortunately, the maximum file size is 25 MB.
What if a file is more than the required limit? How can it be sent? Or what can you do to reduce the size of the file?
There are quite a few tools which you can use to send large files over the Internet, but the process can be quite bothersome for the receiving party. It separates the email from the attachments and adds an pointless step before they can download and view your files.
Lucky for you, there is Smallpdf (us)! With our online service, you can quickly remove the size of your attachments to below 25 MB. Currently, we accept the following file formats: PDF, Word, Excel, PPT, JPG, PNG, TIF, BMP, and GIF.
-
To get started, visit our Compress PDF tool.
-
Drag and drop the file you intend to attach to your email.
-
Choose "Basic compression."
-
Wait as the software reduces your file size. Don't forget to download it!